Garden

Garden Chores for the Month of May

The month of May has arrived….and what a busy month this is in the garden!

The gardens are coming alive and there is much to be done.

But remember the old adage-

In the middle of May comes

the tail of winter. 

So while you are enjoying the beautiful spring weather, remember to have your fleece cloth handy for that unexpected freeze.

I garden in the mid-Atlantic region, which is zone 5-6.  The last expected frost for this region is the middle of May, usually around Mother’s Day, but we are not entirely frost safe until the end of May, or around Memorial Day.  So, plant accordingly.

Here is a list of some things that can, and probably should be done in the garden this month-

  1. Perennials can be planted.  This is also the time to dig and divide any overgrown perennials, such as hostas and daylilies.
  2. Tender summer blooming bulbs, such as dahlias, gladiolas and canna lilies can be planted out after the last frost.
  3. After the spring blooming bulbs have flowered, remove the spent flower head but leave the foliage until it dies back naturally.  Wait to cut off the leaves until they have turned brown.
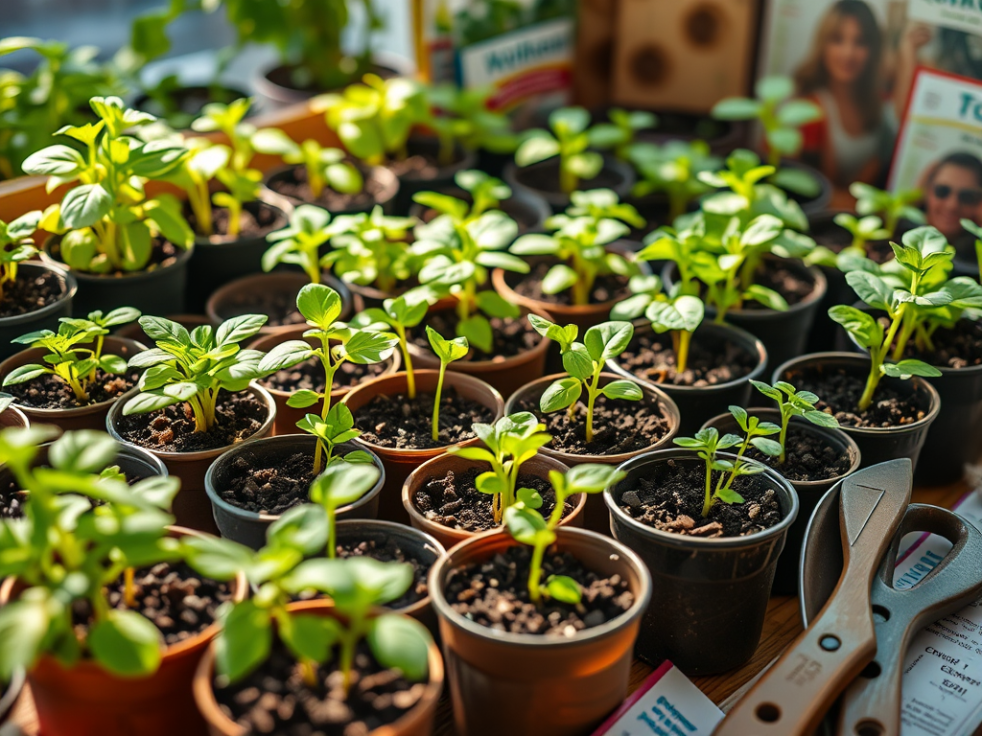
  4. Harden off your seedlings. Any seeds that have been started indoors should be potted up and can be taken outside on nice days to begin hardening off so they are prepared to be planted out.
  5. Warm season flowers and vegetables can be direct sown in the ground after the last frost.  For vegetables, these would be green beans, corn, cucumber, pumpkin and squash.  For a longer harvest window you can plant short rows of each every 2-3 weeks for a longer successive harvest.
  6. House plants that have spent the winter indoors can be taken outside on nice days to get acclimated to being outside again.  Put them in a sheltered area and do not put them in direct sun.  You can begin fertilizing them now.  Any pot bound plants need to be re-potted up.
  7. Window boxes, planters and pots, as well as flower beds can be planted up with tender blooming annuals after the last frost date.
  8. Prune any trees and shrubs that need help. Remove all dead, diseased or crossing limbs.
  9. Prune back the spring flowering shrubs after they have finished blooming to keep them compact such as lilac, forsythia and quince.
  10. Prune and shape any evergreens if needed.
  11. Prune and fertilize roses.
  12. Begin mowing the lawn.  Leave the grass cuttings to provide nitrogen. Re-seed if needed. Now is the time to spread any ‘weed and feed’ product on the lawn.
  13. Set up supports as needed.  In the vegetable garden-tomato supports and trellis for climbing vegetables.  In the flower garden-trellis and supports for climbing plants such as clematis.
  14. If you use an irrigation system, get it set up and tested before too much growth has taken place.
  15. Make sure that newly planted seeds are kept watered.
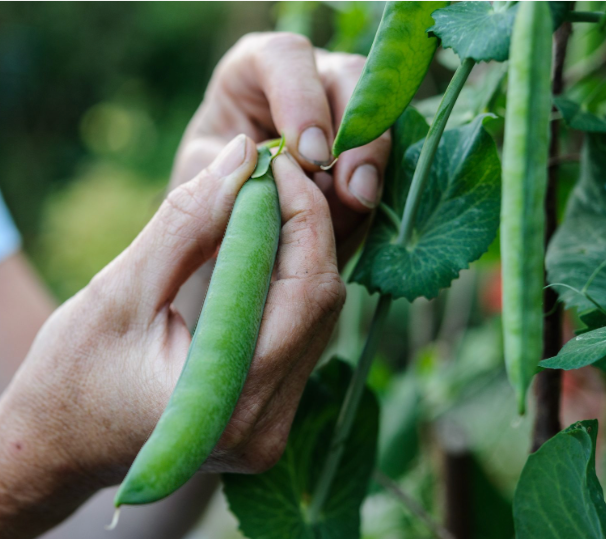
  16. Regularly harvest the rhubarb and asparagus.
  17. Do any thinning of early spring sown vegetables.
  18. Put up hummingbird feeders.
  19. Keep up the regular maintenance of the the yard and garden.  This includes weeding on a regular basis.  Try to keep after the weeds while they are just starting to grow and still small. The object is to not let any weeds go to seed.  Weed pressure is highest in the spring and early summer, and if you can keep after them, it will not be so bad later in the season.
  20. Fertilize as needed.
  21. Mulch as needed.  Do not apply mulch until the ground has warmed up sufficiently.  Keeping the garden mulched will cut back on so much work later on.
  22. If you haven’t already, start and keep a garden journal.  Also, take regular pictures of your garden.  It is amazing what you can’t remember from year to year and photos are a big help.

More work now will mean less work later when the heat of summer is here.

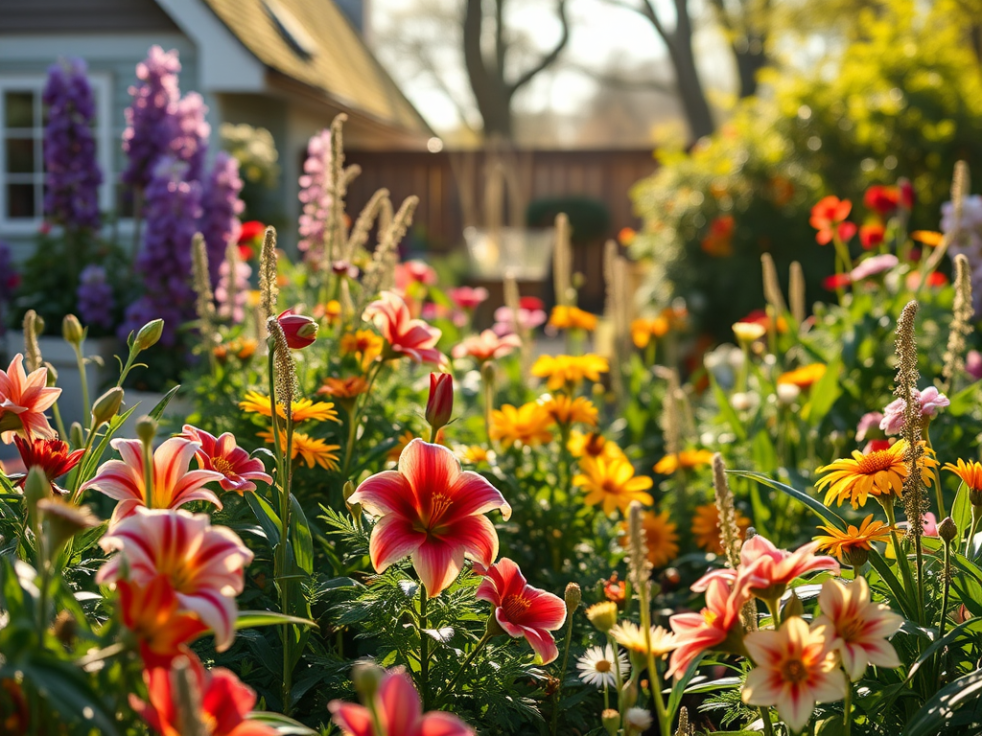
( AI generated photo)

So, enjoy the beautiful spring weather while it is still not too hot.

Take time to savor the sights, sounds and smells of May.

A Prayer For Spring

Oh, give us

pleasure in the flowers

today.

And give us not 

to think so 

far away

As the uncertain

harvest.

Keep us here

all simple in the 

springing

of the year

Robert Frost

Happy Gardening!

Margie

Garden · Uncategorized

How to Successfully Grow Peas

Peas are one of the first crops that you can sow in the vegetable garden. They are also one of the easiest vegetables to grow.

Most peas are ready to harvest in 50-70 days after sowing. A second planting of peas can be made 2-4 weeks after the first one and the harvest can be extended. They are a cool weather loving vegetable so are best planted in the early spring. Peas can even handle a late snow and even some freezing temperatures. Peas need to mature while the weather is cool. They can also be planted as a fall crop when the summer heat has abated.

How to Grow Peas

Location

Choose a sunny location with at least 6-8 hours of sunlight.

Soil

Needs a well-draining soil. Amend the soil with compost or well aged manure before planting. Do not over fertilize. This will create excessive foliage growth over pea production. Peas are light feeders. Peas are also nitrogen fixers-putting nitrogen back into the soil. Heavy feeding vegetables can be grown when they are done.

When to plant

Plant as early as possible in the early spring, about 6 weeks before the last projected frost in your area. I grow in zones 5-6, and this is usually in March and April. Raised beds are ideal if your spring is long and wet. If planting peas as a fall crop, plant 6 weeks before the first projected frost for your area.

How to plant

Peas do not like their roots disturbed once they germinate and are best direct sown in the ground. This is a good reason to have the ground cleared and ready to plant in the fall.

The seeds will germinate in about 6-17 days. The pea seeds can be soaked in water overnight to help them germinate sooner, but it is not necessary. The temperature of the soil should be above 40 degrees. If the temperature is too low, it will take the seeds longer to germinate.

Plant your pea seeds in a furrow 1-1/2 inches deep and 1-2 inches apart. Do not thin the seedlings as they emerge. Rows can be planted 12-24 inches apart.

How to grow

Most pea varieties, even the bush type, need some type of support. It is best to keep the foliage off the ground and it makes the peas easier to harvest. Have the supports in place before you plant so as not to disturb the fragile roots. Peas can be grown on a trellis, chicken wire, stings or netting. Tree branches and twigs can also be used as a support. Plant a row of seeds on each side of your support or trellis. Bush varieties of peas grow 18-30 inches, while pole varieties grow as tall as 4-6 feet.

Weed the peas gently and mulch to keep weeds from growing and the soil temperature down. Keep the peas watered.

Companion Plants

Peas grow best with beans, coriander, corn, cucumbers, radishes, spinach.

Peas do not like garlic, onions and potatoes.

Crop Rotation

Do not grow peas in the same location for 3 or 4 years.

Harvesting

Pick your peas as soon as they are ready and early and often. It is best to pick peas in the morning after the morning dew has dissipated. Use two hands to pick the peas-one hand to hold the vine and the other hand to pluck the pea pod off.

Cool the harvest quickly. The peas can be keep in the refrigerator for about 5 days and you can keep adding to them until there is enough to eat.

Peas can be eaten raw-they are a nice treat freshly picked while out in the garden. They can be eaten as a raw snack and in salads. They can also be used in pasta dishes, soup, casseroles, and stir fry’s.

When the plants begin to turn yellow, it is time to cut them off at the ground. Leave the roots in the ground to provide nitrogen for the next crop.

To preserve your pea harvest for later in the year, it is easy to freeze them. Shell the peas, blanch in boiling water for a few minutes, immerse in cold water, then drain and pack into plastic bags and freeze.

Varieties of Peas

There are 3 basic varieties of peas.

1. English or Sweet peas. These peas have an inedible pod and need to be shelled.

2. Snow peas. They are flat, stringless and the whole pea pod is edible.

3. Sugar Snap peas. Thick edible pods that contain full size peas.

There are also a variety of yellow peas and purple peas.

The History of Peas

Peas are traditionally planted on Saint Patrick’s Day.

Peas, being quick growing, were the vegetable of choice for the genetic research done by a monk named Gregor Mendel in the mid 18th century. His experiments led to ground breaking genetic research in the Laws of Inheritance, the Laws of Dominance, the Laws of Segregation and the Laws of Independent Assortment.

Have you ever grown peas? Are you planning on growing peas this year? Comment back and let me know how your pea growing went!

Garden · Uncategorized

How long are my seeds good for?

While it is February, one can taste the full joys of anticipation.

Spring stands at the gate, with her finger on the latch.

Patience Strong

One thing that needed done before I began my spring seed buying frenzy, is that I needed to go through the seeds that I already had.

They were a big, jumbled mess! I gathered them all together and dumped them on the table.

I sorted through all of these old seeds packets. I weeded out (no pun intended-there will be plenty of weeding in the near future!) and threw away the outdated seeds, keeping only those that would be viable. There is a seed viability list below for you to refer to if you are going through your seeds.

All of my seeds nicely stored in a plastic container, in alphabetical order of type and date. It is very easy to flip through them and to quickly know what I have and what I still need to buy.

There is an optimal way to store seeds to extend their viability. They should be stored in a cool, dry dark place and should be kept from moisture and temperature fluctuations.

If you are not sure of their viability, there is a simple test you can do to check them. Just take a few seeds, place them on a damp paper towel, roll the towel up and place the paper towel in a plastic bag. Mark the bag with the date. Leave the bag in a warm place and after a few days check for any germinating seeds. If you have a 50% germination rate you can still use them, just sow them more thickly than usual.

Here is a list of the viability of vegetable seeds.

1 year

lettuce, onions, parsley, salsify

2 years

corn, leeks, okra, peppers

3 years

asparagus, broccoli, carrots, celery, kohlrabi, peas, spinach

4 years

beets, brussels sprouts, cabbbages, cauliflower, swiss chard, eggplant, fennel,

kale, pumpkin, radish, rutabaga, squash, tomatoes, turnips, watermelon

5 years

artichokes, cantaloupes, cucumber, collards, endive, radish

Garden · Uncategorized

Benefits of Growing Your Own Seedlings


Have you considered starting your own seedlings this year?  It may seen like a difficult thing to do, but with a little know-how it is easy to accomplish.

Here are some reasons to start your own seeds this year.

  1. Better selection.  Buy your seeds early to avoid not getting what you are wanting and had planned on growing. Seed companies have so many more varieties than the seedlings that are grown by the nursery, greenhouse or big box store.  In a previous post-SEE HERE-there is a list of some of the seed companies that seeds and plants can be ordered from.  Most of them have a website and you can order on-line. Or you can request a paper catalog be mailed to you.  I always so enjoy taking my time to read through the paper catalogs before I place my order.  The choice is yours, not only what has been started by the garden business.  A word of caution!  Be careful and thoughtful or you will get carried away and order way too much!  Don’t ask how I know this….
  2. Save money.  You get more for your money when buying seeds as compared to buying the usual 6-packs of seedlings.  For the price of the six-pack you get many more seeds in a packet. If you only need a few seedlings, most seeds can be saved for future use.
  3. Growing Practices.  You can have control over the growing practices.  If you are concerned about pesticides, herbicides, GMOs, etc., you can make sure of how your seedlings are being grown.
  4. Planting and Harvest.  When you grow your own seedlings you have control over the planting time.  You may want to start seeds early to be set out under a protective cover for an earlier harvest or start seeds late to have a later fall garden.  You can grow just the amount you need.
  5. Earlier Harvest. Some types of plants will need to be started indoors as the growing season is not long enough to get a harvest before frost, but many of the plants that can be direct sown can be started indoors to get an earlier harvest or flowers.  You can get a jump on the season.
  6. Successive Planting.  You can have control over successive seed starting to give a long season of harvest.
  7. Proper Plants.  You can make sure that you are growing plants suited to your region and location.
  8. Seed Saving.  Many of the plant varieties (open pollinated or heirloom) can left to go to seed and the seeds saved from year to year.  This is another way to grow plants that have become acclimated to you location.
  9. Quality Control.  You have control over the quality and quantity of the seeds grown.  You can grow strong, healthy seedlings.
  10. Food Security.  Growing your own plants is a good way to enjoy some food security in this unsettled time.  Grow enough to can and freeze and you will have food all year long.
  11. Avoid the Spring Crowd.  I always make a trip (sometimes many trips!) to the greenhouse in the spring, but if you want to avoid the frantic rush of everyone in town scurrying to buy those plants to get them in the ground in a hurry, you do not have to go there.
  12. Sharing and Swapping.  Starting your own seeds is a great way to do sharing and swapping with others.  For many years I started seedlings to sell at the Farmer’s Market in the spring.  The left-over seedings I would take to church and share with whoever wanted any plants, usually tomatoes. When church was over I would pull my van up to the church entrance and open the back with a sign-Free Tomatoes!  I grew lots of unusual heirlooms and got lots of questions about each kind.  It was a great joy to share with others.
  13. Fun.  Seed starting is a very good garden activity to do when those long winter blues are feeling heavy.  How nice to get your hands in the ‘dirt’ and be growing things when not much is happening outside. It is very fun to watch the seeds emerge and grow.


Have you ever started seeds before?  Leave me a comment and share how your seed starting experience went for you!

Planting Seeds

We can plant the seeds of kindness,

Seeds of hope and joy and peace.

We can plant, and we can water.

Only God can bring increase.

All God asks  is faithful planting,

Constant reaching toward the goal.

Then His blessed Holy Spirit

Can reach out to save a soul.

We know God will never ask us,

“Just how well did you succeed?”

All He wants is faithful living,

Faithful planting of His seed.

Garden · Uncategorized

Top Seed Catalogs for your Garden….and a Give Away!

A List of Seed Catalogs

While the winter winds howl and the snow blows and you are tucked inside a warm house under a warm throw with a warm drink near by….

It is time to crack out those seeds catalogs that have been arriving in the mail.

What a welcome sight these catalogs are….with thoughts of great garden dreams as I peruse them.

Some of my past seed order packets…

And some free seeds thrown in!  Yes, I started them, planted them out and they grew well.  I had been wanting to grow some ancho chilis for chili rellenos and here they were!

Here is a list of some of the seed companies to order from;

Park Seed Co-www.parkseed.com

Johnny’s Selected Seeds-www.Johnnyseeds.com

Totally Tomatoes-www.totallytomato.com

Vermont Bean Seed-www.VermontBean.com

Pinetree Garden Seeds-www.superseeds.com

Burpee Seeds-www.burpee.com

Gurney Seeds-www.gurneys.com

Botanical Interests-www.botanicalinterests.com

Jung Quality Garden seeds-www.jungseed.com

Southern Exposure Seed Exchange-www.southernexposure.com

Sow True Seeds-www.sowtrueseed.com

Baker Creek Heirloom Seeds-www.rareseeds.com

High Mowing Seeds-wwwhighmowingseeds.com

Harris Seeds-www.harrisseeds.com

R.H. Shumway-www.rhshumway.com

Wild Garden Seeds-www.wildgardenseed.com

Renee’s Garden-www.reneesgarden.com

Territorial Seed Co-www.territorialseed.com

True Leaf Market Seed Co-www.trueleafmarket.com

Peaceful Valley Farm and Garden Supply-www.groworganic.com

Terroir Seeds-www.underwoodgardens.com

John Scheepers Kitchen Garden Seeds-www.kitchengardenseeds.com

Just a few comments about some of the above companies-

I order many of my seeds from Pinetree Garden Seeds.  I think you get more seeds for the money.

Territorial Seed Co.-I always get in trouble here!  The garden dreams run away with this catalog!

Totally Tomatoes-Any tomato you are looking for!

Vermont Bean Seed-I always like the thought of growing a huge variety of dry beans, but alas, I don’t have the room, so I just keep dreaming!

Baker Creek-This catalog is the the Cadillac of seed catalogs and the unusual variety is amazing. It is real eye candy for gardeners.

Burpee, an old reliable company, but a little on the pricey side.

The Burpee seed display is already out in the local Walmart store.

This is just a partial list of all the seed companies that are out there.

Now is the time to start planning that garden and getting your seed order in.

Yes and No….

Yes, it is nice to have a diversion from house cleaning, but yes, I still plan on cleaning my house!  Spring house cleaning on the way!

Do you have a favorite seed catalog to order from?

And now, for the free give-away!  I have a 2025 Farmer’s Almanac calendar for someone.  All you have to do is make a comment-any comment, and we will draw 1  name and get it right out to you.  I love my FA calendar.

Have fun seed shopping!